A rectangle log cabin quilt pattern tutorial.
Earlier this year, on instagram, I noticed there was a #scrappylogcabinQAL and a movement to #sewmystash2015. I had been stashing sunny yellow fabrics for almost a year to make my daughter some sort of quilt. Why not combine the two hashtags and sew my daughter a log cabin quilt from stash? Yes!
I was contemplating using square log cabin blocks, but found that they didn’t give me the twin sized quilt I wanted or they ended up with an odd number of blocks along the side, which didn’t suit the layout I wanted to use. I realised that a rectangular block would work much better, so that’s what I went with. My blocks are 10″ x 11″ finished (sewn together).
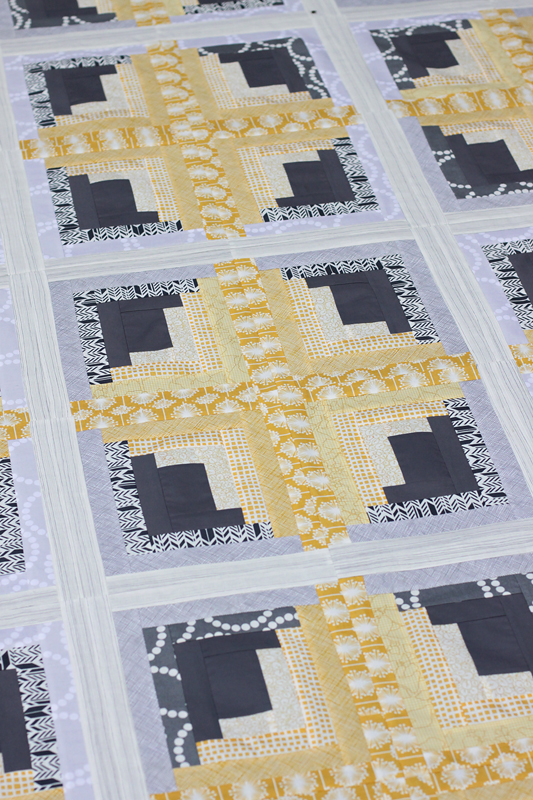
My final layout was 6 blocks by 8 blocks, and they are arranged in the configuration commonly known as Sunshine and Shadows. Boy, there are some configurations out there – this was the hardest part of this quilt, deciding which to go with. And then deciding which way to gradate the colours. Dark against light, light against light, phew. I finally settled on my version as I felt it made the ‘stars’ pop the most.
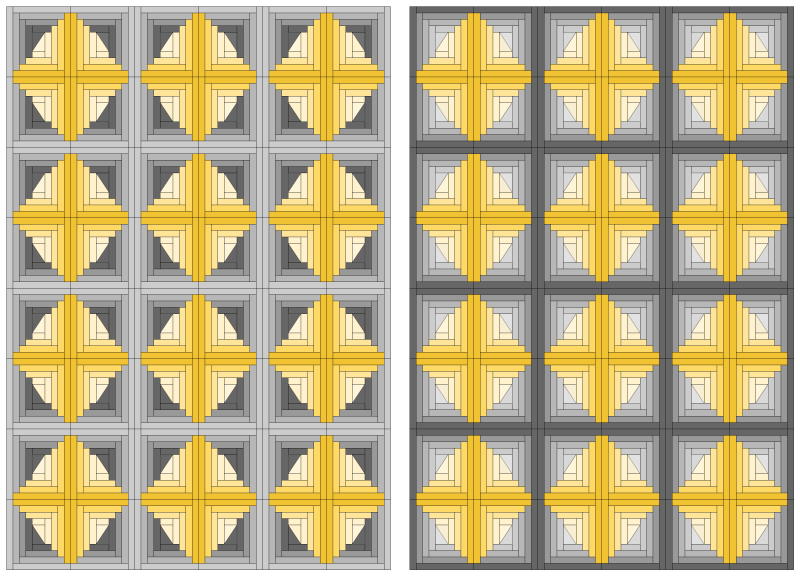
Light to dark vs dark to light in the grey fabrics. I was also contemplating using a HRT instead of a plain centre rectangle in these mock ups:
I’ve put together a tutorial should you wish to make this 60″ x 88″ twin rectangle log cabin quilt pattern. But before I get to that, here’s an outline of a few things that made it really quick to put this quilt together.
Tips to Sew A Log Cabin Quilt Fast
Normally when chain piecing I like to leave about a half inch between blocks in the ‘chain’ and then cut them apart with my ruler as a guide, lined up along the length of my block. This is painful.
With this quilt, when I chain pieced I butted my blocks up right next to each other, like this:

Then when I cut them apart it only took one cut instead of two, and many times I just used scissors and eyeballed it.
I did NOT trim the blocks back with each round, I just trimmed the final blocks to 10.5″ x 11.5″
I only ironed after each round, not after each individual log. Finger pressing the seams within each round worked fine for me. When I did iron, I pressed all my seams to the side. It was super quick to iron them like that.
These blocks came together so quickly using this method – it was so gratifying.
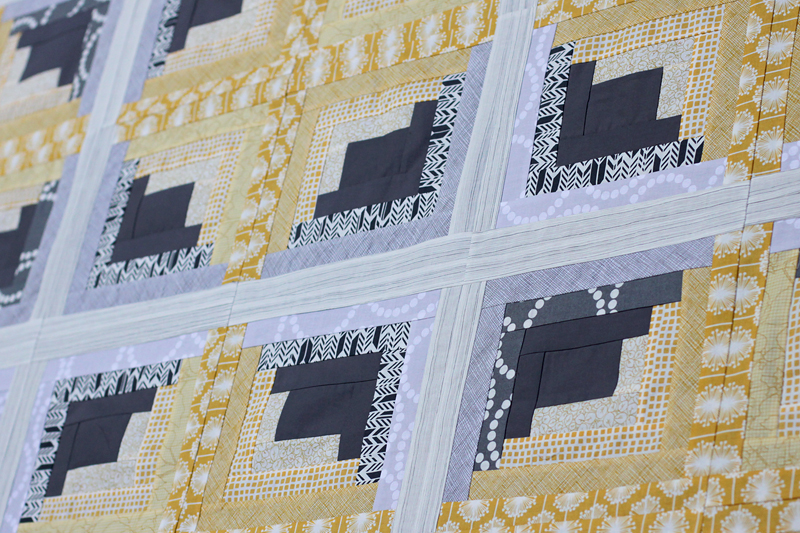
It would be remiss of me not to point out that this method will lead to some inconsistencies in your blocks – you can see below that my greys aren’t lining up from block to block. I don’t mind and I know my daughter doesn’t care, so I was happy with the trade off.

Once the top was finished I basted and did some fairly quick quilting.
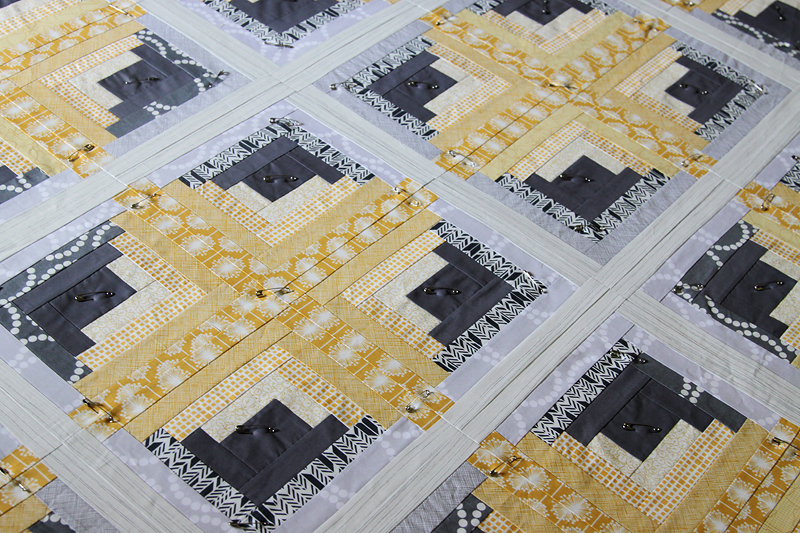
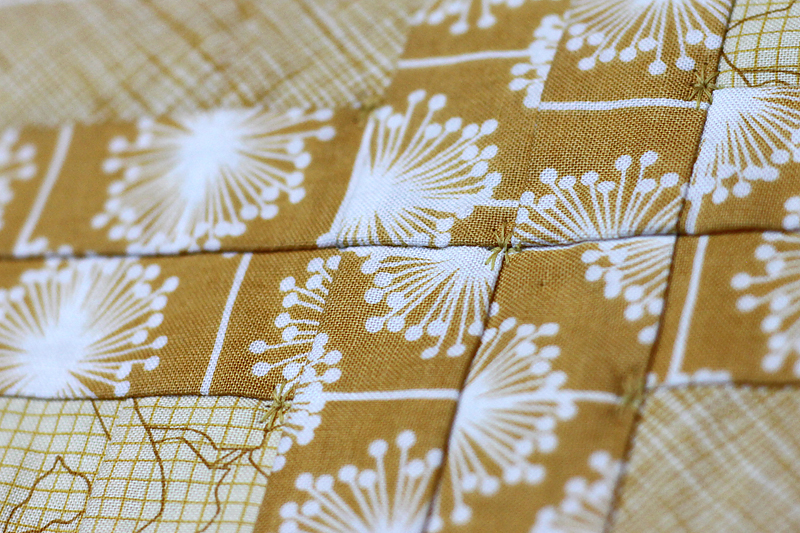
I used a decorative straight stitch to sew anchoring lines between all the ‘stars’ (along the light grey grid) and around the edges. Then I decided to tie the quilt within these lines, using a decorative star pattern dotted around various spots within. The star stitches work in nicely with the starburst pattern and the quilt is very soft and cuddly given the low density quilting.
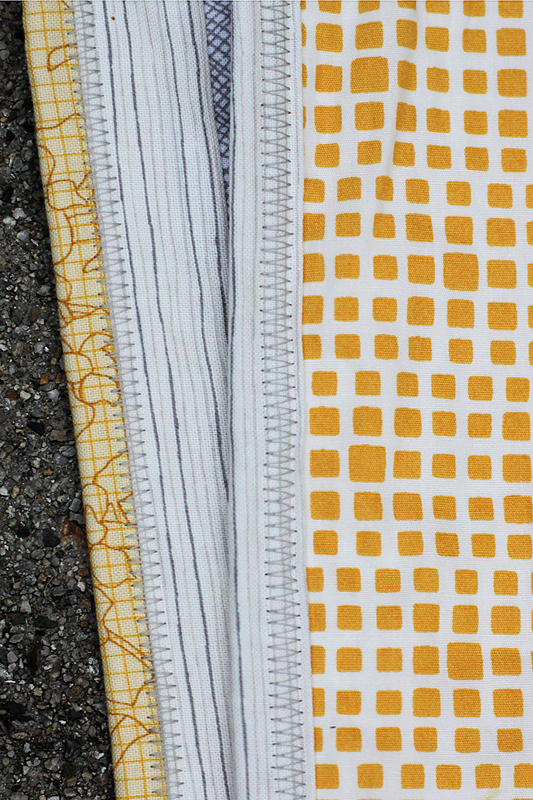
The binding was scrappy and I used a zig zag stitch to machine sew it to the quilt – my first time ever. Again, not perfect, but super functional and I don’t believe it takes anything away from the busy design.
So there you have it! A twin sized, rectangular log cabin quilt pattern, whipped up in a jiffy.
Rectangle Log Cabin Quilt Pattern Tutorial
- This pattern is for a twin sized quilt which finishes at approximately 60″ x 88″
- Individual log cabin blocks are 10″ x 11″ finished (sewn together). They measure 10½” x 11½” unfinished
- You’ll need 48 blocks to create the quilt, laid out in a 6 x 8 block formation
Rectangle Log Cabin Quilt Fabric Requirements
All the pieces required to sew the 48 blocks are listed below for the yellow and grey fabrics. There are two logs for each colour, one short, one long.
For those cutting from scraps, log sizes are immediately to the right of the log, along with the number of logs required in brackets. For those cutting from yardage, fabric requirements for each colour are to the right of the scrap requirements. The yardage measurement/strip instructions gives you enough to cut both the short and long logs for that colour.
Grey Fabric Requirements

Yellow Fabric Requirements

As these log cabin blocks are rectangular, rather than square, they are directional. The one block cannot be turned through 360° to form the pattern. Two different forms need to be sewn. This is very simple – the placement of the second log will determine the direction of the block. From there, it’s just a matter of continuing to sew yellow to yellow and grey to grey. Too easy!

Chain piecing the blocks will make your block production very quick. If you want super-accurate blocks, sew with a scant quarter inch seam and trim after every round of logs.
Here are the measurements to trim your blocks to if you’d like to spend the time doing this.
First log round:

Second log round:

Third log round:

Fourth log (final block):

As I mentioned at the start of this post, I did NOT spend time on this. I finger pressed each round outwards and then continued on sewing. I only pressed once I had finished the blocks. Chain piecing combined with no pressing in between saw these blocks sew up very fast. So satisfying!
Of course, you should sew how you prefer and in line with what you intend to do with the final product (enter in a quilt show vs. give to the dog :)
Either way, I hope you enjoy sewing up this twin size rectangle log cabin quilt as much as I did!
All the best and happy sewing,
Kirsty
If you liked this pattern make sure you’re signed up for my newsletter. Don’t miss any of my new tutorial or pattern releases. It’s as easy as pie to unsubscribe as well, just click the unsubscribe link at the bottom of any email. I don’t want to send you anything you don’t enjoy.


I would like to know the total amounts of each fabric that I need to purchase, since I am not using scraps. I can’t wait to make this as a gift. Thanks in advance.
Hi Tracey, it’s all up there in the blog post – in the diagram showing strip requirements. Cheers, Kirsty
I was googling log cabin quilts and came across your site. I cracked up when I read your comment to stop watching TV and drinking wine and pay attention. So funny, and so true! Your quilt looks great! Thanks for sharing!!
Vera
Thanks for dropping by, Vera! I’m so glad you enjoyed the quilt pattern. And yes, it’s incredible what you can achieve when you pay attention, ha!
I was googling log cabin quilts and came across your site. I cracked up when I read your comment to stop watching TV and drinking wine and pay attention. So funny, and so true! Your quilt looks great! Thanks for shariing!!
Vera
Does this quilt have sashing between the blocks? I was going to make it based on your commentary your process but then saw others comments and requests for the pdf – could I get that sent to me? Thank you in advance!
Hi Christine – no PDF for this currently – just all the details in this blogpost. You can bookmark it for future. Cheers,
Kirsty
I’m almost finished my first log cabin quilt……and I’ve been quilting for over 11 years. Now, I can hardly wait to try the Rectangle Log Cabin quilt.
I also am waiting for the Disappearing Nine Patch quilt pattern.
Thanks so much for sharing your many talents.
Warm regards,
Sharon A from Florida.
Thank you, Sharon! Good luck with all your log cabin quilts – they really are a lovely design that can be reinvented in so many ways.
Great instructions and cutting charts. Thank you!!!
I’m going to try this, thank you. Anastasia
Wou ld love to try this quilt design. haven’t tried this one yet. Thanks for all the instructions.
Hi Patricia, the software is saying that the confirmation email was delivered to your email account – perhaps it’s in your spam or promotions folder?
I love this pattern never seen it in rectangle
Hi Debbie, just pop your details in the boxes in the blog post and the file will be automatically emailed to you.
Beautiful quilt! Looking forward to making it!
Log Cabins are my favorite quilts.I will love making this one.
I love the rectangle vs square idea – even if it was needed for final size. I like slightly “off” ideas that usually give a little umph to traditional ideas. Thank you.
Even squinting, I don’t really see stars, but I like it anyway. =)
Just absolutely love the idea that it does not need to be perfect! The love you put into it exceeds perfection.Thank you for sharing….blessings!
This is gorgeous! Thank you! Happy Easter.
Very bold and beautiful
Could another strip of 2 blocks be added to make this a queen size? Would it look OK? I LOVE it. Thanks so very much!!
Beautiful quilt! I’m looking for all kinds of ideas for yellow and grey quilts, as my granddaughter likes those colors, and I’m thinking ahead to her high school graduation (in 4 years, but sometimes I’m slow!), so thank you for the tutorial. Looks very modern and traditional at the same time.
Kirsty, do you ever wonder whose lives you have touched by sharing your love of quilting? I want to raise my hand to let you know that you have touched my life. I am relatively new to quilting and have a burning hunger to learn as much as I can as I embark on this journey of mine. I enjoy getting your regular emails and love the quilts and patterns you share. I hope to have more time to converse with you as I venture into the jungle that is my sewing room. Thank you for sharing. Kris
New subscriber and I just love this quilt. Can’t wait to try it.
This is the prettiest Log Cabin design that I have ever seen. Thank you for sharing.
lovely looking quilt. sometimes log cabin design can look very disjointed but this has a lovely motif design.
I made this for my pastor, who left a temporary position at the church where I work for a permanent position. I used dark to light shades of yellow for the crosses and dark to light blue for the borders, alternating strips of solid and patterned fabrics. It looked very dramatic! I have a picture if you would like a copy…
I made this for my son & his wife for Christmas. It really turned out well
I haven’t made a log cabin quilt. This pattern looks ideal.
I have a nephew that is struggling, and this would be a nice quilt to make for him to give him comfort.
What a lovely sentiment, Rebecca. Good luck with your sewing!
Beautiful quilt and colors! I love the modern “take” on the classic log cabin. And, I appreciate you not trying to be perfect in matching seams and sewing the binding. I enjoy my quilting hobby so much more if I let go of “doing it perfectly”.
Thanks Anita! I’m glad you enjoyed the pattern and my relaxed attitude to seams with this one. Sometimes matching is important, but with this one, I’m happy to let it slide :)
Hi Nelva, I’m sorry that you are having problems. The file should download automatically to your computer when you confirm your subscription. Your computer will have a default folder it uses for downloads, and hopefully it’s in there. I will email it to you, too, so you will have it regardless. Happy sewing!
I have been addicted to log cabins for all my quilting life. I love the way you have captured the greatness but made them do what you want them to. I like all of your ideas, the others make them really circle with the hst. Something to think about for the next one. Thanks for sharing.
Thanks Nanette, I’ll keep that in mind. I love a good log cabin, too, in all the shapes!
Absolutely love it! I really want to make one but i have a jelly roll so mine would be 2-1/2″ not 1-1/2″ and not sure it would look as pretty
Love it! I can’t wait to make my own.
I fell in love with your quilt the first time I saw it. This will be my next project. :) thank you for sharing the detailed information.
Thank you so very much for posting this detailed tutorial. It’s been all the rave over at College Of Quilts. So thankful and putting it on my list of quilts to make. Blessings!
Can’t wait to try it…it is simple beautiful!!
Lovely and making it so easy with the measurements and tips!! Thank you.
This is absolutely gorgeous!! I love, love, love the colors together. I think it’s so cool how someone can put colors together that you’ve never thought about & it just works. It’s amazing to me how you can see an outfit, quilt or anything made out of certain fabrics & you think that it looks ok but then someone does the same thing in different colors & it’s just WOW!! You really did a great job on this quilt! It’s beautiful! :)
Oh it’s lovely. Thanks for the tutorial.
That quilt is just…ah! So awesome. and I think the machine binding give it a modern hip vibe.
I love your colors and especially how the dark yellow fabrics come together to form a secondary pattern Great graphic!
This is so pretty! I love the way the gold center pops out from the background! It’s perfect, and thanks for sharing your process! It’s very inspiring!!
Your fabric selection is outstanding! Beautiful job on so many aspects. I’m glad you chose to do such a loose quilting/tieing on the quilt. I prefer a lofty feel, and it does add to the warmth factor. I hope your daughter treasures it.
Julie @ Pink Doxies
As ever I am in awe … that is a beautiful piece of work Kirsty.
Genius Kirsty. I am a fan of log cabins but haven’t made one for ages. I love the idea of the rectangular log cabin, although I may come unstuck if I actually have to concentrate that early on, ha! As always your instructions are really helpful and succinct. Congratulations on another gorgeous quilt. (No turquoise/aqua!)
Oh, I love it! I’ve always loved log cabin quilts and the fact that there are so many possibilities and now you added rectangles to the mix! Genius! I love the contrast of the yellow and black, it really looks cheerful and chic at the same time! Thank you for all the sewing tips and measurements!!
Thank you for another great tutorial! I love this quilt
Another winner Kirsty! I love the yellow and grey together! For some reason it reminds me of those old fashioned photo corners you see in photo albums of the the forties and fifties! And the decorative stitches are a pretty alternative to the straight line quilting which is so popular at present!
That is awesome Kirsty. Love the decorative stitches, makes it extra special :)
This is beautiful Kirsty! Love the grey and yellow colour combo!!
Your quilt is GORGEOUS! Your fabric placement makes such a beautiful geometric pattern. Thank you also for the tutorial. Log cabins had never appealed to me before, now I see how much of a difference color placeent can make.