The tutorials for the first 3 blocks of the Farmer’s Wife 1930s Sampler Quilt Sew Along are now live so I wanted to share my version of Bonnie (Block No 16).

Throughout the Sew Along, Angie of Gnome Angel will post about every block. There will also be at least one guest blogger completing the block and posting any tips and tricks they have discovered.
You can find Angie’s post on the Bonnie block here.
There are two guest bloggers covering Bonnie this week (given it’s an easier block); you can find Lucy’s version here at Charm About You and Melissa’s version here at Oh, How Sweet!
I love seeing how everyone is interpreting the blocks in their own style. If you do too and want to see more, become a member of the almost 4000 [!!] strong Facebook group.
Right, so let’s get on with my version of Bonnie. As I mentioned in this earlier post, I’m using Pat Bravo’s rather classy Artisan collection with some additional matching Art Gallery Fabrics cuts to provide more variety. I am also planning a bit of different approach to the block layout – I will be making four of each block and joining them together to make a super-sized block. For some of the blocks, the result will be exactly that – four distinct, identifiable blocks joined together. But for others, the joining will lead to the creation of a completely new large single block. Exciting, isn’t it? (you can tell I don’t get out often).
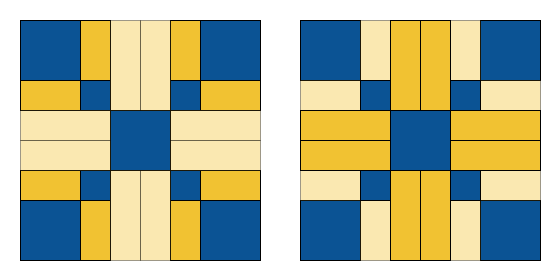
With Bonnie, I knew the joining would lead to something big and different because the block is asymmetrical. In fact, I chose to include Bonnie for exactly this reason. First up, I had a choice on how I would join the four blocks, as you can see below:

Depending on which way you rotate and join the blocks, you get a very different final four-square.
I decided to run with the first version, which then left me with one more choice of colour allocation. I already knew that I wanted the navy in the largest square and that I would team it with a low-volume and a saturated mustard. All I needed now was to decide which mustard would go where:
And let’s be honest, they both look great, so it wasn’t going to be a problem whichever route I took.
For the navy squares I used the Betoken in Shines fabric and fussy cut the circular shapes.

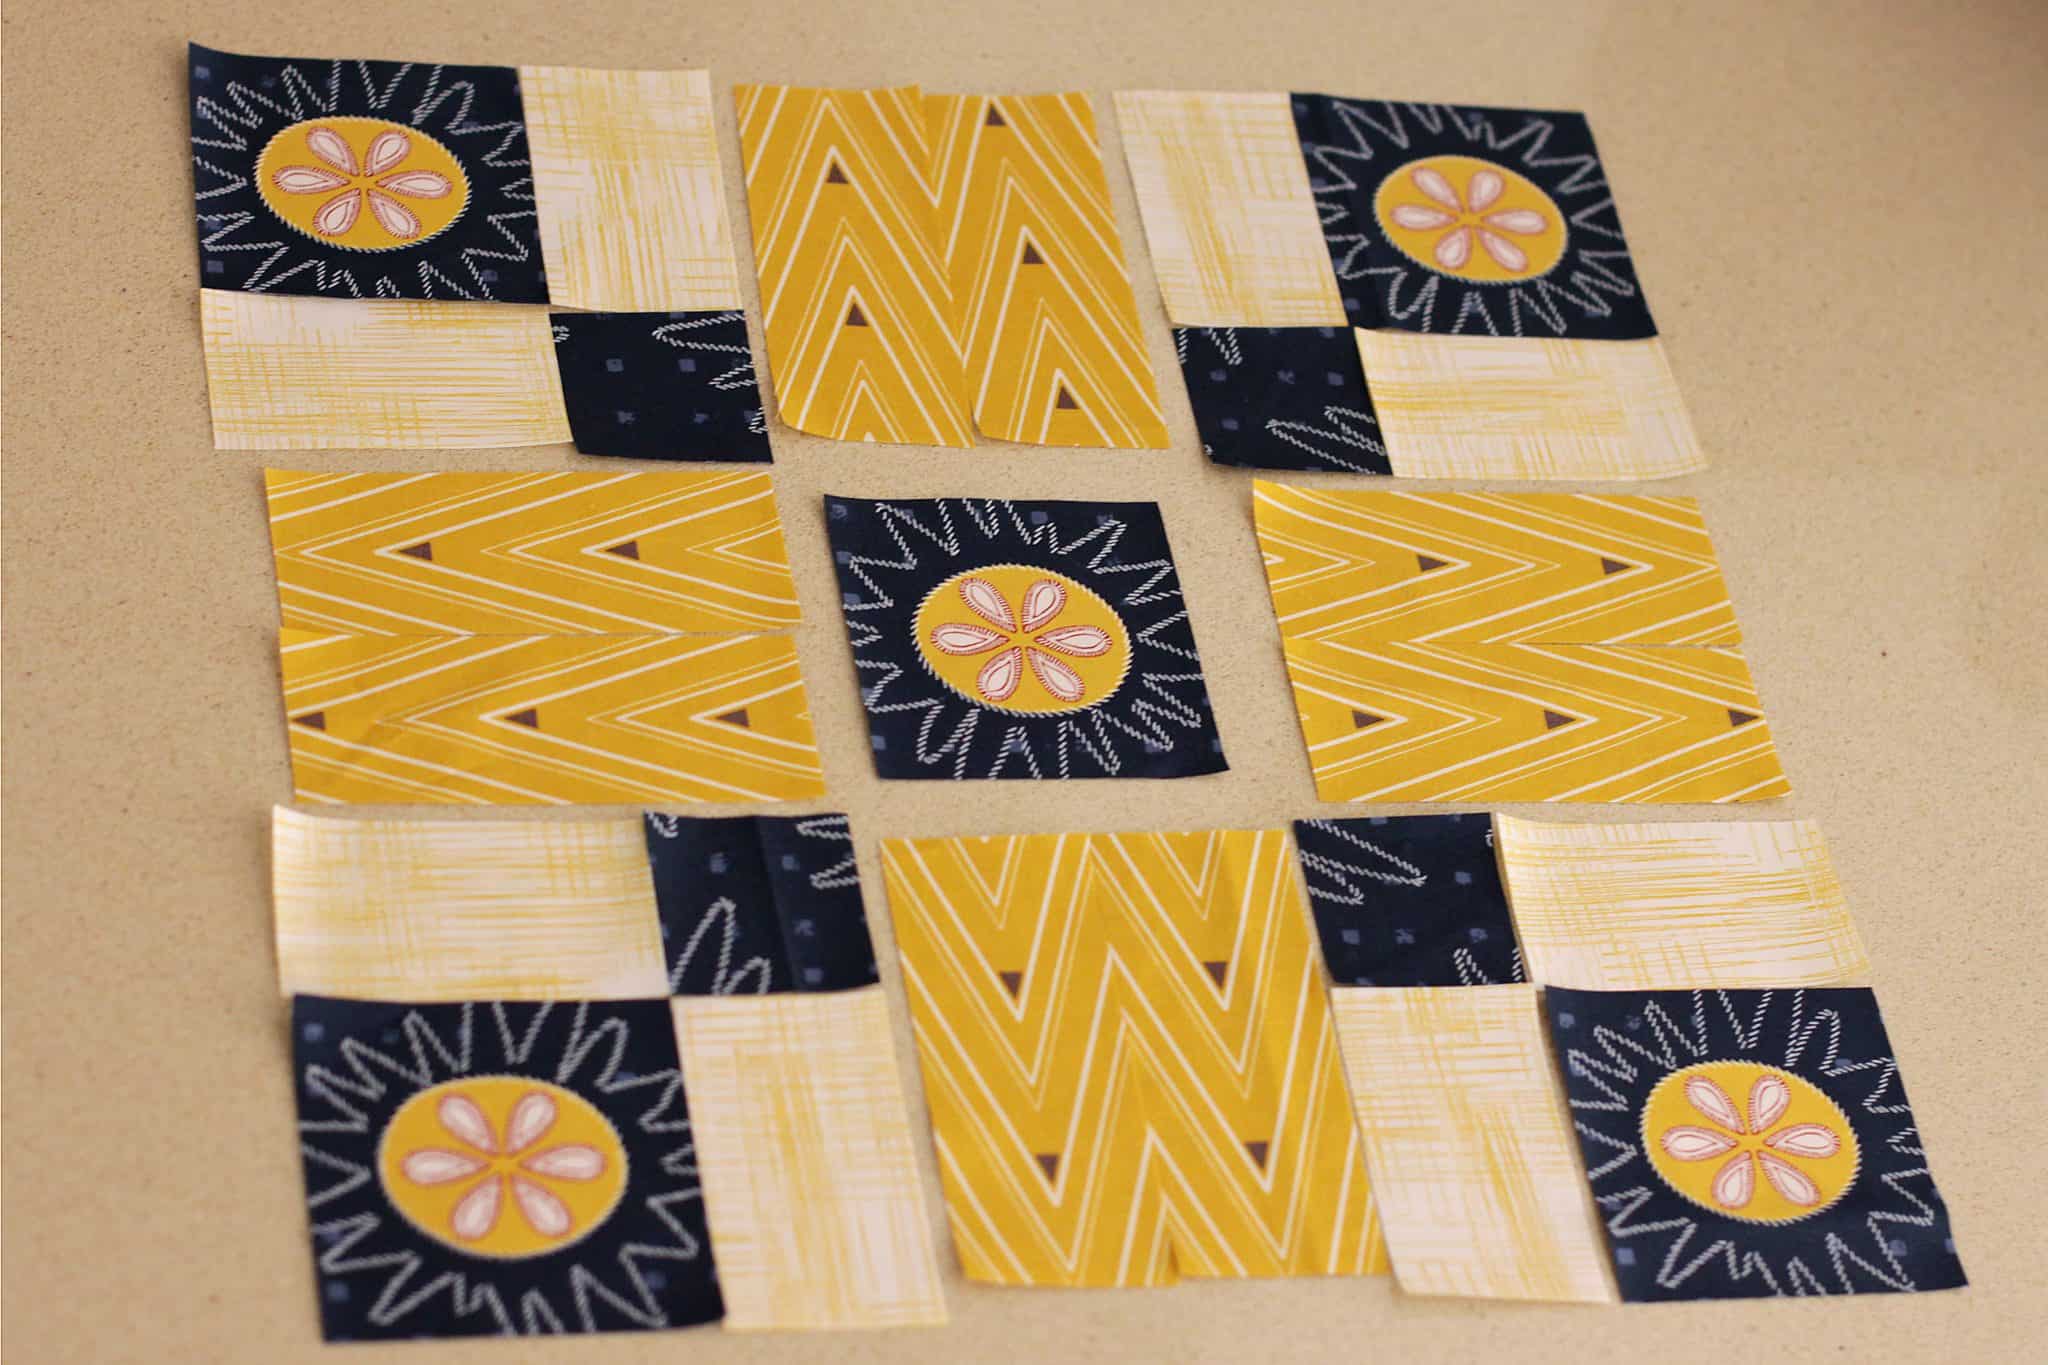
I should point out that I didn’t just make four Bonnie blocks and join them – I decided to amalgamate the four small navy centre squares into one big square as it gave me the opportunity to add another fussy cut circle pattern. That larger square turned out to be exactly the same size as the other large navy squares (for those following along in their books), which made it very easy to include.
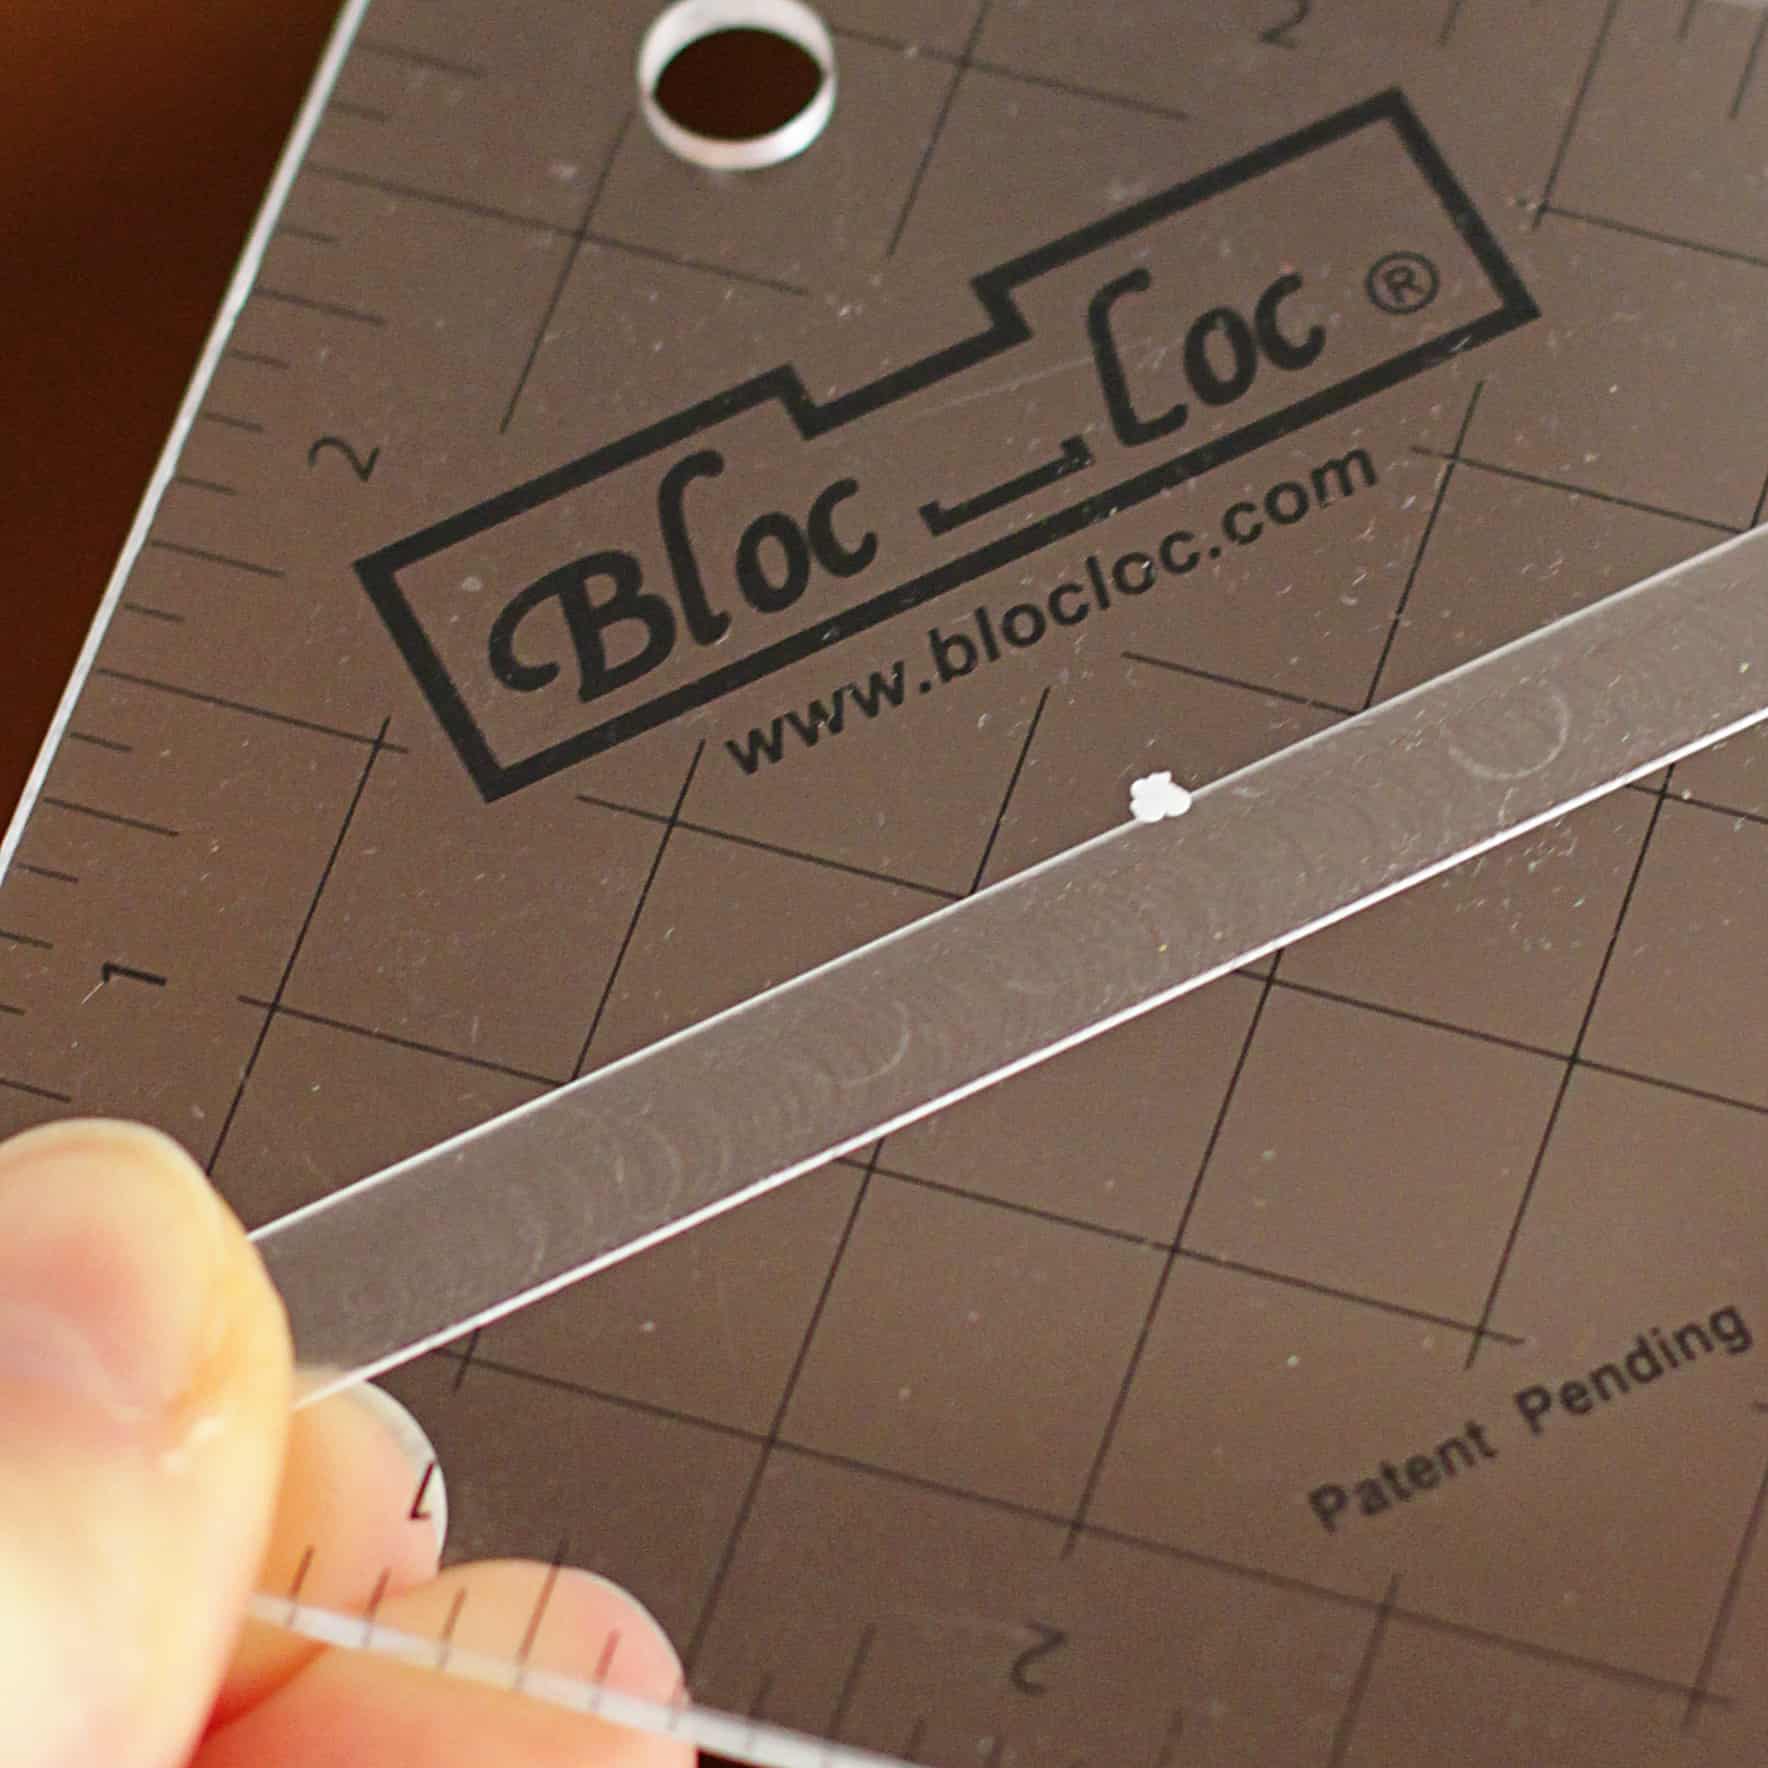
Unfortunately I didn’t have a template for that sized square so I improvised with one of my bloc loc HST rulers. As you can see below, I put a tiny dot of correction fluid on the exact middle of the ruler so that I could more easily centre my fussy cuts.
You will see below that I didn’t combine my dark mustard pieces and cut a single, larger rectangle – that was purely because of the spacing of the little triangles on that fabric’s print. If I had combined the two skinny rectangles into one wider rectangle, I wouldn’t have been able to fussy cut the little triangles into the middle of each piece that way. I would have ended up with triangles right in the seam allowance, which I didn’t want.
I really love the way the final block turned out:
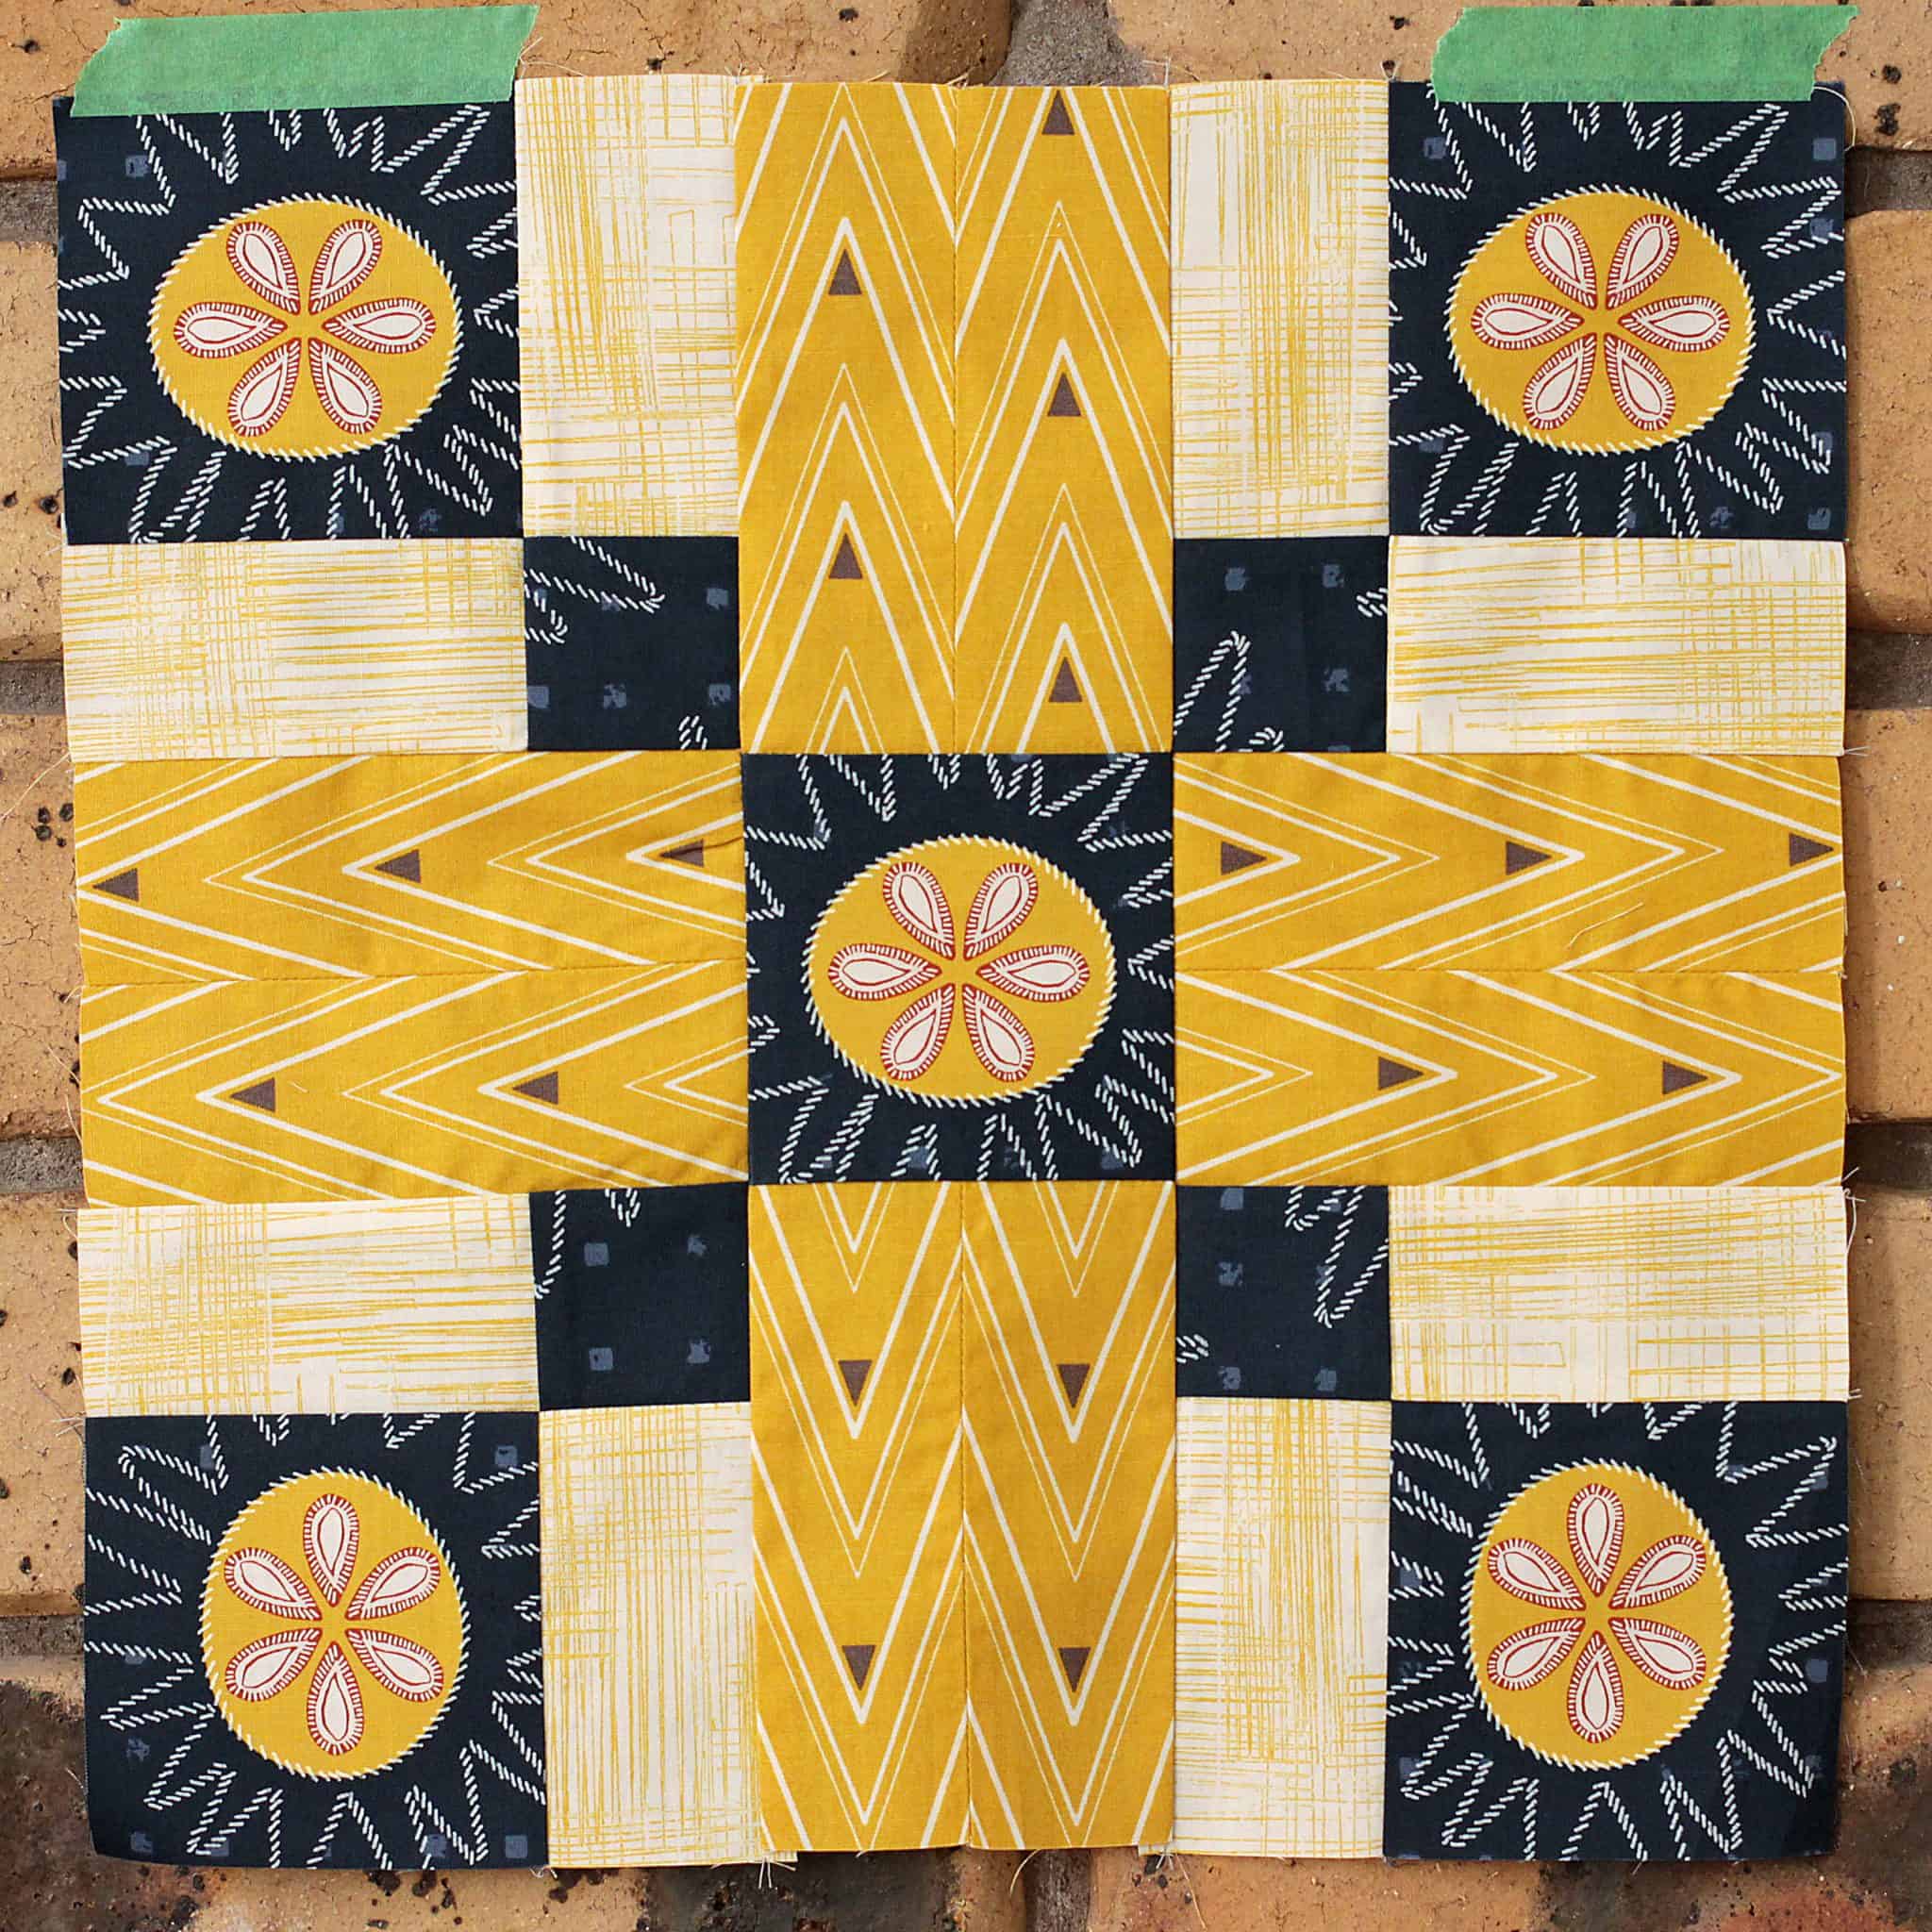
Those with sharp eyes will see the mistake I made with my fussy cuts. The circular designs aren’t in fact circular, they are ovals. And I messed up the orientation of the bottom two. Perhaps I will unpick them and change them in the future, but for now I am happy to live with it. What can I say, I’m tired!!
I hope you’re all having a wonderful weekend and that sewing is making up even just a little part of that.
Until next time!
K x

I love the fabric you chose! Very pretty!
I would leave those blocks just as they are – they immediately drew my eye into the site and onto your forum for the first time. It’s the odd colour shape in a quilt that can make it stand out. I have lots of exposure to fussy cutting in applique but your fussy cutting in piecing challenged me. I don’t mind the ‘mistaken’ use of an oval where you meant to use a circle – its that sort of inclusion that creates interest and conversation about quilts. If your quilt block had been made 100 years ago people now would say that you used what you had at the time and no one would think anything of that. As it happens you have used what you had and your block is so much more interesting for your having done so!
Although this block is gorgeous, I would be inclined to simplify it by making a 9 patch and cutting it in half both horizontally and vertically and doing inserts. Would be quicker and I’m all for “quicker”. LOL Perhaps using 5″ squares and then using 2 1/2″ inserts – or larger – if so desired. Again, it would depend on the design of your fabric for fussy cutting the corners and the center medallion.
I love your patterns and the Farmer’s Wife block is terrific. Thank you for sharing. Love the colors. I’m not good at picking colors, it takes me forever to gather the right ones for a project so I appreciate it when someone like you guides me. Anyway, many thanks for a fun block.
i just love this block where do i find the measurments to make it your colors are out standing thankyou for sharing i am fairly new at this thanks again
Great looking square and I like the fabrics. Why couldn’t you make a 9 patch, cut it in half then add the inside pieces. That would eliminate all the added piecing. Just a thought.
That’s absolutely an option, Delores!
Would you do 9 patch in 3 fabrics?
It’s been nearly two months since you posted this. I REALLY hope you decided to leave those lower squares as they were. Your block is striking as it is, and life is so much more interesting with little variations. Perfection is like Pinterest – nobody can measure up – and your block is authentic and true.
this is the most distinctive and impressive block that I have seen. Thank you for showing your block on the linky party site.
This looks great! I love your idea of the “tiled” blocks! :-) The fabrics are also lovely, I’m sure it will be a very stylish quilt!! I actually also ordered the book and have made two blocks from the tutuorial PDFs while I’m waiting on it. I’m really excited about the idea of joining the QAL, but I’m not sure how realistic it will be for me to keep up … Well, I guess I can do it at my own pace and follow along what the others are doing, anyway. It’s always such fun when a big group of crafters interpret the same pattern! I’m looking forward to your next set of blocks! :-)
A great start Kirsty! I love the colour scheme you have chosen- it certainly looks like a tile from a floor!
Hello Kirsty,
Love what your doing with these blocks and the fabric.
Thanks for explaining why you’re cutting your fabric just so!
Hi Kirsty! Go you for making this quilt!!! I often think it would be an amazing challenge but then I look at the book and go… Nah. I sure will enjoy watching your progress though. I just know you will have a very modern interpretation of it and it will look amazing. Bummer about those mistakes, hate that. It won’t seem so bad after a sleep.
Love what you have done with that black. I’d probably have to unpick those two pieces but I would be cursing all the way!!